Patrick’s Painting

Paint Sheen/Finish

Paint Sheen/Finish? We’ll just call it sheen throughout this blog so we don’t confuse anyone.

Many people have no idea what a paint sheen is or how to choose the right one for their project.

Paint sheen simply means the level of glossiness in paint. The glossier it is, the more of a shine it has. Today, most paints come in one of the following sheens: Flat, Matte, Eggshell/Satin, Semi-Gloss, and Gloss. It can be a bit overwhelming on choosing the right sheen so I’m here to help. The way I have listed the sheens above goes from least glossy to most glossy.

Flat – Flat paint absorbs light and therefore hides many surface imperfections but does not handle dirt well or stand up well to scrubbing.

Matte – Matte paint is the most popular sheen we use for walls. It is just a little more shiny than flat. It handles scrubbing well and I have used it in every area of a house.

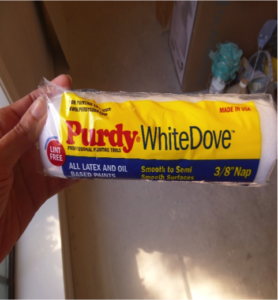
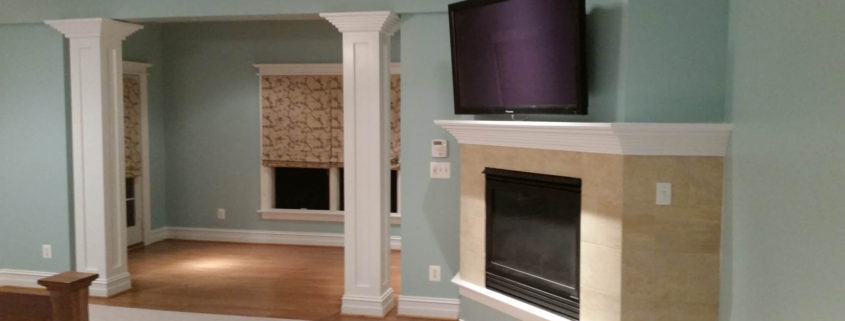
Satin/Eggshell – When you think of Satin/Eggshell think of a silky finish. It looks good on walls and is smooth enough to stand up to dirt and cleaning. It can be used in any area of the home. We use Sherwin Williams paint products and they don’t carry an Eggshell sheen, so the equivalent to this would be Satin.

Semi-Gloss – A Semi-Gloss sheen reflects between 40-50% of the light that hits it and is very easy to clean. Most houses we go into have semi-gloss on the trim, doors, cabinetry, and shelving. This is also used in bathrooms because it reflects moisture and isn’t too shiny.

Gloss – A gloss sheen reflects the most amount of light and has the best cleaning ability; it is best for playrooms with rowdy children, laundry rooms with muddy dogs, or trim/doors that take a lot of abuse from rowdy children and muddy dogs.

Each paint sheen will vary from brand to brand. Some sheens will be shinier/less shiny than others. The downfall about a shiny sheen is that minor imperfections can be more of an eyesore compared to a Flat or Matte paint.

A general rule for sheens is that the shinier the paint is, the easier it is to clean. When choosing a sheen, take these factors into consideration.

  • How much light does this room get?
  • Am I going to like shiny walls?
  • Is this a high-traffic area?
  • Could my rowdy child possibly draw on the walls or my stinky, muddy dog dirty them up?

These are all questions you should ask yourself before making your final decision. If you need more help with your sheen, give us a call and we’ll be happy to help.

Paint Sheen and Finish

Interior of Your Home

When is The Best Time to Paint Your Home?

What is the best reason to paint the interior of your home?

People are painting the inside of their homes all year around, three hundred sixty something days a year.

Some people paint their home because they are stuck in the 80’s and want to come back to modern times.

Some people paint their home because they feel that a color will evoke a certain feeling.

People paint their home when they first move in because they want to make it their own.
Lots of people paint their home when selling because the Realtor requires them to – not everyone is going to like your 80s-color scheme; make it neutral, modern (Gray), and get it freshened up. No one wants to buy a house that has marks and indentations on the walls.

Here’s what I think the best reason to paint your house is – because you want to and when selling.

We’d love to help with your color scheme and offer a free 90-minute color consultation from Sherwin Williams on homes where painting 3 or more areas.

Best Painting Tools

The Best Tools to Keep on Yourself While Painting.

So you’re planning on painting your bedroom yourself, Great! What are the Best Painting Tools to keep on yourself while doing the work? You’ve got paint, rollers, brushes and the room is prepped with drop clothes on your flooring and plastic on your furniture.

Some essential tools you should keep on yourself while painting is a 5-1 (funny looking scraper tool that has a big curve in it), utility knife, rag, duster, and sandpaper.

5-1 Multi-Tool
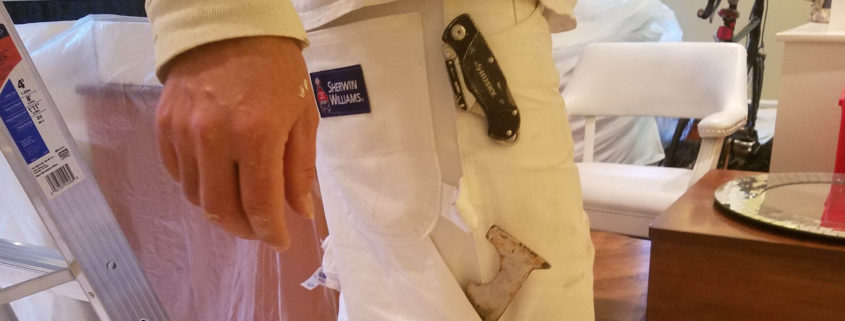
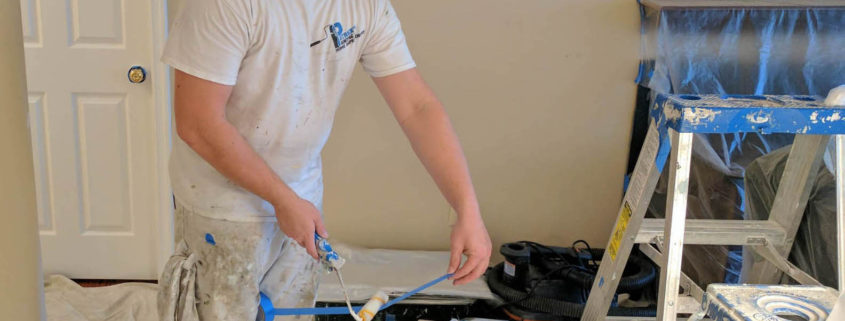
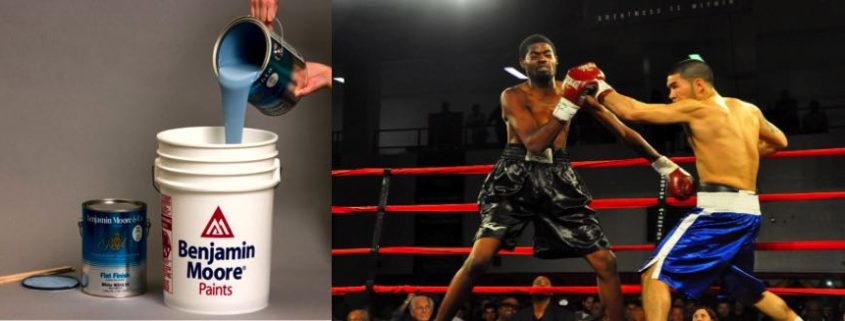
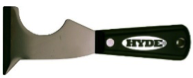
A 5-1 is the ultimate painter’s tool, it’s like Mohammed Ali and his boxing gloves. You can scrape areas, open paint cans, hammer nail pops (nails coming through the wall) back in, pull out the paint left in your roller, and cut out old caulking with the sharp tip.

Utility KnifeYour utility knife should always have a fresh blade and can help you with the removal of old caulking, being precise with cutting out damaged wall areas, and scraping old paint off windows (when you take the blade off the base of the knife).

Paint Rag
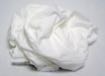
Your rag should be damp and used for drips or splatters. It doesn’t matter if you’re the Michael Jordan of painting you’re going to have a drip or splatter every once in a while.

Duster Brush
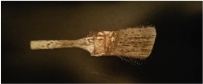
A duster is usually an old paint brush this will help you remove dust/debris from base trim, windows, drywall patches, etc. We like to cut our handle down so it doesn’t bulge out.

Sandpaper
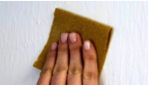
Last but not least is the sandpaper. This allows you to sand smooth any rough areas that might have been missed or overlooked. My team and I always keep these items on ourselves. Why? If you have the proper tools on you when you run into a trouble area, you are more than likely to repair it right there instead of neglecting it.

I know this may seem like a lot to carry but if you wear painter’s pants or cargo shorts it will be easily manageable. Best of Luck!

Preparing a Paint Roller

How To Prepare A Paint Roller

Using A Paint Roller? Prevent Your Walls from Looking Like Fuzzy Sheep.

You’re ready to start rolling your walls, your paint is set up and your roller is attached to a rolling pole. You dip your brand-new roller into a pan of paint, apply it to the walls only to find that you now have a bunch of tiny roller fibers stuck to your wall… Dang!!

This has now made your beautiful, smooth walls look like a fuzzy sheep just rolled around on them.

Here is a trick to removing the fibers from the roller before you start painting.

Grab a roll of painter’s tape – we prefer the 3M blue 1.41 tape. Pull out an arm’s length of tape – don’t tear it! Put the bulk of the tape between your knees and with one hand, hold the end of the tape.
Now with the other hand, roll your roller over the piece of tape going back and forth, like wax on wax off. Your roller should be attached to a handle while doing this. Use two to three pieces of tape to make sure you have removed all the fibers.

Each roller brand is different. You can go the cheap route and buy something that is going to shed like crazy or you can spend a dollar or two more and get something that isn’t going to shed and leave you with a beautiful, smooth, texture. We prefer the 9-inch long, 3/8-inch nap White Dove rollers by Purdy. These rollers shed very little and leave the walls with an extremely smooth appearance.

Purdy White Rollar

Purdy White Rollar

Tapping The Rollar

Tapping The Rollar

Patricks Painting Drywall Repair

Drywall Repair

Got holes in the wall? Well, let me teach you how to fix them with Patrick’s Painting expert drywall repair system.

A lot of people have had drywall holes in their ceilings or walls made by kids, dogs, themselves, other contractors, and angry men after Cowboys’ playoff games.

It’s a big eyesore but quite easy to fix. I’ll explain how to do this yourself through the Patrick’s Painting drywall repair process.

Before getting started, you need to make sure you have all the right tools to make this drywall repair as easy as possible for yourself (listed below are the tools you will need).

  1. Cover all the furniture in the area where working with plastic and lay down drop clothes, it’s going to get a little messy.
  2. Using a measuring tape and drywall knife, make the hole into a square. Each side opposite of itself should measure the exact same length.
  3. Measure your hole and cut a piece of drywall to that exact measurement; watch your fingers. You will need to make sure you have the correct thickness of drywall before installing, the most common are 3/8 and ½ inch drywall.
  4. Before installing the drywall, install two pieces of wood on the opposite sides of each other behind the drywall. Using 1-inch drywall screws, secure the wood to the existing drywall. We like to use standard 2×4’s for our wood but almost any scrap wood will work.
  5. Once you have installed the wood, install the piece of drywall to the wood using drywall screws.
  6. Apply mesh tape where the new piece of drywall meets the existing drywall on all four sides.
  7. Apply drywall compound to this area; this is where it gets messy for rookies. You will need to apply two to three coats of the compound before you have completely blended the new drywall with the old drywall. Let the compound dry before you add another coat
  8. When finishing the drywall compound, leave it as smooth as possible as this will eliminate additional time sanding/scraping in between drywall coats. After this area is dry, sand smooth, and use your hand to feel for any imperfections.
  9. Wipe any drywall dust off with a rag and prime the area with an oil or latex primer. After the primer is dry, put the finish coat on and start the best part- clean up.

If you need more help with your project, please don’t hesitate to contact me – we’d love to help.

Tips

  • After installing the mesh tape, spray oil primer over the mesh tape for better adhesion of tape.
  • To cut down on dust, try wet sanding, you can do this by wetting a rag, sanding sponge, or grandpa’s old sock.
  • Use fans and a heat gun/hair dryer to speed up the drying process.
  • Use a spray can primer once the drywall has been sanded smooth. This will eliminate setting up/cleaning a brush, roller, and bucket. Just don’t use the spray can and heat gun together or you’ll have bigger problems.
  • You can use any drywall compound or spackle to finish this area but we prefer to use EZ sand 20 because it dries within 20 minutes, sometimes… (LOL!)
  • Make sure you measure twice and cut once, you want the new piece of drywall as tight in there as possible to make smoothing out the compound easier for you.

Tools needed – Mud knifes, Mud pan, EZ 20, Heat gun, Mesh tape, Tape measure, T-square, Square, Straight edge, Utility Knife with a fresh blade, Drywall, Drywall saw, Wood, Sandpaper, Drop cloth, Plastic, Tape, Screw gun, Drywall screws, Pencil, Ladder, Oil primer, Trash bags, Sanding pole, Fans, Vacuum, Rags.

Patricks Painting Drywall Repair-Before

Before

After painting, paint is still wet

After – painting, paint is still wet

After 3rd coat of compound

After – 3rd coat of compound

Boxing Paint Gallons

Boxing Paint Gallons

Boxing Paint Gallons. No, we’re not talking about how to beat up your paint gallons! But did you know I had 25 amateur fights and 1 pro fight as a boxer? I’m talking about pouring all the paint gallons together into one container before you start painting. Why?

When we buy paint, the color is added to white paint by a computer. The computer can mess up by putting too much or too little of one pigment, which can make that gallon of paint a slightly different color. By boxing paint gallons, you have achieved consistency throughout the paint job.

But what if you didn’t box the paint before you started and need to fix the paint job?

I have had times when I didn’t box the paint beforehand and the areas from where I cut in (used a brush) looked different from where I had rolled.

I’m sorry to tell you this, but you should box what paint you have left, and start over. This is the only way to make the color look exact throughout the whole room.

The Moral of the Story

Whenever you get more than one gallon of paint, always box your paint so you don’t have to curse the paint store for the next few hours.

This can also happen when you pick up more paint from a different store. The machines can be calibrated differently giving it a much different color. But this is a story for another blog.